


Up to €20,000 bonus + 75 free spins!

Get 10% cashback up to €200 on DAILY losses!
Spin for massive rewards!

Reel through 364 daily tournaments


About Slott.com Casino
Today we will do our best to complete a quite significant challenge: review Slott.com Casino and give our honest opinion on it. Though being a new player in the industry, we’ve seen Slott quickly gain quite a lot of dedicated fans, followers, and players in recent years.
An extensive game library, a license from Curaçao, multiple language support, and bonuses for both newcomers and regular players – these are what we think the defining qualities of Slott.com are.
A cute fox mascot, over 12.000 Slott slots in the gaming arsenal and a selection of both popular and innovative Live Casino games to play and chat are here to entertain newcomers along with a 200% welcome bonus of up to 20.000 € plus 75 Free Spins. Players can triple their first deposit by selecting the “200% Welcome Offer + 75 FS” on the deposit page and depositing at least 10 €, then rollover the bonus amount 40x within 15 days. The offer also includes 75 Free Spins on Play’n GO’s Fire Joker with a 0,05 € Free Spin value, available to use within the next 7 days, while any Free Spin winnings must be wagered 20x and can be withdrawn up to 2x of the bonus amount to the Main balance. In addition to that, there are numerous tournaments, network promotions, and other constantly changing and sometimes surprising bonuses.
⚡ About Slott.com Casino
Slott.com positions itself as a gamer-friendly, minimalistic, and rewarding casino. The website and app design is slick, minimalistic, and easy to navigate. Contributing to the friendly vibe of the site is a friendly red fox – Slott’s mascot, featured in their most prominent offers and promotional emails.
🎲 Types of Games
After reviewing the game library of Slott, we were positively surprised to find a big variety of games, from your classic 3×3 reeled one-armed bandit to more innovative and sometimes even unexpected games. Below, we will review some of the best, noteworthy games that you should defiinitely check out, as well as different types of gaming experiences.
🎰 Popular Games
Slott.com Casino boasts a 12.000+ games library from the best providers in the industry. Here are some of the most popular games that their players enjoy the most.
- Slott Adventure – an exclusive experience that features the site’s adorable mascot fox, this games takes the classic, thrilling mechanics of Aviator and makes them better. With its beautiful graphics in the mix, every flight through the Slott city becomes even more exciting as you watch your stake multiply to incredible heights.
- Big Bass Splash – a modern classic, this slot from Pragmatic Play is as close to real fishing as it can get in the world of gaming. Cast your rod with every spin, watch the bait fly, and go for the big fish, scoring wilds and Free Spins along the way.
- Black Jack – a simple but rewarding table game. Mascot Gaming has done a truly great job: they condensed everything that makes blackjack a game for generations into a single, easily accessible experience and added a simple yet intuitive design to spice it up.
- XXXTreme Lightning Roulette – perhaps the most extreme Live Casino game out there. Evolution made one of their best gaming creations by adding mechanics to the already thrilling roulette experience: as of now, it’s the only Live Casino roulette where you can score an unbelievable 2.000x multiplier.
👉 Slots
A lot has changed since the creation of the classic one-armed bandit slot machine, and bringing slot gaming to the Internet has brought new, multi-leveled ways of adding fun to games.
Take, for example, Pragmatic Play’s ever-popular Sweet Bonanza – the symbols can fall on every spot of the 6×5 grid and are popped once you reach a certain number of the same symbol. Then the tumble feature kicks in – and new fruits and candies fall from the sky, bringing hundreds of possibilities for new, big wins.
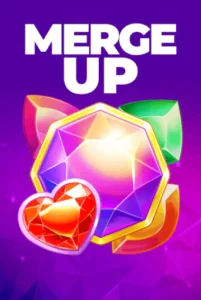
Another good slot to take a look at is BGaming’s Merge Up – once you hit a combination of symbols here, they merge and transform into even more valuable ones: and if you collect enough of the highest-valued symbol, a bonus game begins!
With over 12.000 slots in the arsenal, one can expect to spend several weeks until all of the games are explored – surely there are some hidden gems waiting to be unearthed.
👉 Table Games
Just like its counterparts from the Live Casino section, table games allow you to enjoy your favourite card games from any corner of the Earth. What makes them stand out is the absence of Live Dealers and yes, even though that might take away from the atmosphere as there certainly won’t be a lot of talking going on, it’s a great choice for people who want to play quickly and without much waiting.
Texas Hold’em Poker 3D by Evoplay is an excellent example of a table game done well and with good taste. The design reminiscent of old cowboy movies and tumbleweeds rolling across the road, makes you feel like every single bet is a matter of life and death and a good ol’ revolver shootout over too good of a hand may erupt at any moment.
👉 Live Casino
This category includes everybody’s favourites like blackjack and roulette along with live dealers to narrate the game. While these are well-known and loved by the community, we focused on finding out whether there is something special among Slott.com’s games While looking for a good example of a Live Casino game, we stumbled upon Crazy Time by Evolution.
Though already quite popular, we thought it was a great example of a not typical Live Casino experience: with a 54-segment wheel spinning every round and bets on which type of segment will land, the process is starkly different from your typical blackjack or poker game. The rarer the symbol that lands, the bigger the returns, so diversifying your bets to include several options might be a good strategy – add to this the special games like Coin Flip and Pachinko and random multipliers every single round, and you have an unexpected good mix of mechanics that every enthusiast should try out!
👉 Jackpots
Highly volatile and extremely unpredictable, jackpots are here to make every high roller’s dream come true. Though going through cold streaks is notoriously easy on jackpot slots, the possibility for ludicrous hits is also quite high. Scoring a jackpot is the ultimate dream of all who play these – at any time players can score huge wins. Two types of jackpot games exist: progressive and fixed jackpots.
- Fixed jackpots always hold the same value regardless of what occurs during the game. Say you have three jackpots at 52x, 123x, and 523x of your stake – should you lose or win your next 100 bets, these will remain the same.
- Progressive jackpots, in contrast to their counterpart, are constantly changing – this happens because a small part of every bet is added to them, so one day such jackpot might be game 135x, the other 555x your stake. The longer progressive jackpot hasn’t been won, the more appealing it becomes.
Which one of these do you prefer the most and which one would bring the biggest profits We’d say that in general it all depends on your preferences. If you love risk, then jackpots are your choice – nothing will beat the satisfaction of hitting a 1000x multiplier. If you like winning in general, no matter the amount, then the less volatile slots would fit you the best: they offer the same amount of fun and frequent, but lesser wins. As per our review, Slott.com’s arsenal of games is large, diverse, and still growin’, and will give you hours if not days of fun. You will certainly find the games that suit your playstyle there.
💸 Payment Options
Casino Slott only supports bank cards and cryptos. You can view the available ones here:
| FIAT Payment Methods | Currency | Deposits | Withdrawals |
| Bank Card | EUR, RUB | 10 € – 6.000 € | 20 € – 2.500 € |
| Crypto Payment Methods | Network | Min. Deposit | Withdrawals |
| BTC | Bitcoin | 20 € – 250.000 € | 100 € – 2.000 € |
| ETH | Ethereum (ERC20) | 10 € – 250.000 € | 10 € – 2.000 € |
| LTC | Litecoin | 10 € – 250.000 € | 10 € – 2.000 € |
| TRX | Tron (TRC20) | 10 € – 250.000 € | 10 € – 2.000 € |
| USDT | Tron (TRC20), Ethereum (ERC20), BSC (BEP20) | 10 € – 250.000 € | 10 € – 2.000 € |
| USDC | Ethereum (ERC20) | 10 € – 250.000 € | 10 € – 2.000 € |
| DOGE | Dogecoin (DOGE), BSC (BEP20) | 10 € – 250.000 € | 10 € – 2.000 € |
| BNB | BSC (BEP20) | 10 € – 250.000 € | 10 € – 2.000 € |
Important Note! If you decide to deposit with crypto, please always make sure to use the correct network. Otherwise, your deposit will not be credited and may be lost in full. If unsure, please contact customer service – as with all crypto-related matters it’s best to be safe than sorry.
Deposits made using bank cards may take some time to get processed, usually ranging from instant credits to a few days. Crypto deposits are much more flexible in their credit time. Transaction fees that determine the speed of credit are set and adjusted by the depositor, so should you opt for crypto, the choice is in your hands: the higher the transaction fees, the faster the money will arrive at its final destination. Anything unclear Drop Slott’s customer support a few lines – they are experts at payments and can help you prevent mistakes and errors.
✅ Registration and Verification
It is easy to create a new account at Slott.com Casino, and requires no more than a couple of minutes, several clicks, and a dozen key taps due to the unique design.
- First and foremost, go to the official website;
- Click the “Sign Up” button enter your email, password, and phone number – a verification code will be sent to you;
- Enter the code in the prompted field and click “Verify”;
- We’re almost done. Provide your name, a nickname you’d be happy to use and your date of birth;
- Enter the address and here we are – you’re a proud member of the Slott community now!
We always say that you cannot be too careful when it comes to account security – Slott’s agents have instantly advised us to activate the 2FA and complete the account verification. Why should you Because it’s easy and once you’re done, the account will have your name attached to it and should you, for any reason, lose access, it will be much easier to recover it. Plus, the only things you need are an Internet connection, passport or any similar document and a couple of clicks.
Click the avatar icon to go to the menu of your account, proceed to the “Settings” tab and finally click on the “Account Verification.” Once there, upload your pass, identity card, or driving license (make sure that everything is visible and readable) and wait until the manual review is done. That’s it! In the next couple of days, you’ll have an additional security measure – the whole process took less than 2 hours for us, but having peace of mind while you play is priceless!
📜 Licensing and Legal Operation
Slott.com is a proud holder of the Curaçao eGaming license – one of the best in the industry. With 30+ years of experience behind its back, the Curaçao Gaming Control Board oversees the work of several hundreds of casino operators making sure that they follow all the strict regulations and compliance procedures. Holding the Curaçao license entails using certified Random Number Generators to provide game results that are fair, decided by pure chance, and unbiased. In addition to that, all license holders are subject to relatively frequent checks and audits – and Slott is no exception – to ensure regulation, compliance and adherence to rules.
Responsible gaming principles play a big role for everybody who’s involved with theCuraçao Gaming Control Board and this can only be good for players, as they are free to request self-exclusion at any moment, and the casino is required to oblige. Whether it’s for a set amount of time or indefinitely, you can rest assured that should the need arise, you will receive help and be sage. Accessing your account, and, obviously, playing on the website will not be possible as long as the self-exclusion is active but once the SE period is over, the access to the services is restored and players may return to the site if they wish.
In case a casino breaches its or CEG’s terms of service, players can file a formal complaint with Curaçao eGaming and they will manually go through the details of the case to make a final decision. This provides another layer of protection for the player and guarantees fair resolutions of each and every dispute.
➡️ Languages and Currencies Supported
After browsing through the website’s different features and chatting with the local support agents, we can confirm that Slott is a truly multilingual casino – with English as its primary language of service, you can expect to receive both support, should you need it, and good website localisation in 5 more: Russian, German, Italian, Portuguese and French. When asked whether more languages will be added in the future, customer support could not confirm this but half-jokingly responded that everything is possible.
It is possible to make deposits in € (Euro) and ₽ (RU rubles). Given that it’s not much, it’s expected that Slott’s management will add further options in the future. Slott also supports 8 cryptocurrencies which we will list in the following chapter.
➡️ Affiliate Program
Slott is enrolled as a part of the R2D Partners affiliate program. Any casino player with an online presence, be it their friends or streaming fans, can send their application to become an affiliate partner and earn some extra money by advertising Slott products and services to their followers.
With more than 15 years behind their back R2D Partners works with big casino brands like LEON and Twin, and Slott was recently added to the star roster. The company gives an opportunity for every online creator to establish an extra stream of income.
More than 10.000 affiliates are enrolled and managed by 12 affiliate managers, accepting applications from over 15 countries across the globe. Being an affiliate you can expect to receive payments two times per month. With the number of active promotions and features that Slott boasts, both retention and conversion rates have proven to be quite high, bringing even more benefits to the affiliates. Affiliates can expect to receive constant support and creative directions from the management team, bringing your ideas to life.
🤝 Customer Support
Slott’s customer support stands at the ready, waiting to assist players in any of the platform’s six supported languages: English, German, French, Italian, Portuguese, and Russian as well. Assistance can be accessed at any time of day and night through both email communication and instantly delivered live chat messages. Slott.com’s representatives are quite amiable and try their best to answer as soon as it is humanly possible. Usually, it takes around 2-3 minutes to receive an answer in the live chat but may, of course, take longer depending on the type of query. In general, even the most complicated issues should be resolved in no more than 2-3 business days when resolving them via email.
❤️ Why Choose Slott.com Casino?
There are multiple reasons to choose to play at Slott, here are our top ones:
- Large slots library with over 12.000 titles;
- Multiple exclusive games;
- 200% Welcome Offer of up to 20.000 €;
- Multiple bonuses, rewards, and tournaments;
- Quick processing of payments;
- Support of eight cryptocurrencies;
- 24/7 customer support in English, French, German, Italian, Russian, and Portuguese;
- Slick, intuitive Android application;
- Well-optimised mobile and desktop web versions;
- Great minimalistic website design;
- Simple registration and verification process.
And many more. Slott.com is a great choice for player who enjoy minimalism, value their time, and, most imporantly, enjoy exciting gaming!
❓ FAQ Section
What are Slott.com players’ most frequently asked questions Let’s find out and answer them as best we can!
I used the wrong crypto network during deposit. What should I do?
First of all, keep patient. Second, contact Slott’s customer support as quickly as possible and they will, in turn, message the payment team – they are the only people who can help you recover the money at this point. Patiently wait for their answer and provide all the necessary information and the team will do all they can to resolve this in the fastest possible manner.
How can I claim a deposit bonus?
When making a deposit, scroll down to find your available offers. Choose one and proceed to top-up your balance as usual. Don’t forget to get acquainted with the rules of the promotion before you do to avoid possible inconveniences.